
Home > PowerPoint Diagram > 3 Steps to PowerPoint Diagram
There are just 3 simple steps involved in converting your boring bullet point slides into an effective PowerPoint diagram. The steps are:
- Identify the objects and their relationships in the bullet points slides
- Capture the relationship between the objects in a basic skeletal form
- Visualize the objects
We will understand the process much better if we work through some examples.
First, let us take a simple examples and gradually move up to tackle more complicated ideas.
Even with a simple example, you will see a dramatic difference in the way your PowerPoint slide looks:

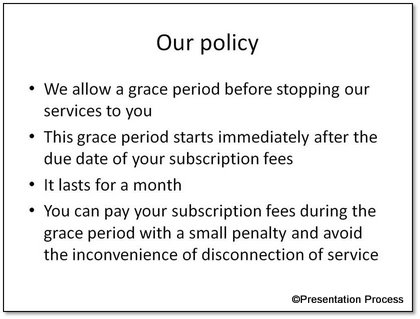
Here is the original bullet point slides. Please go through it.
Step1: Identify the objects and their relationships
As we discussed earlier, all ideas can be represented as objects and their relationships. The first step in transforming bullet points into visual diagrams is to identify these elements.
So, we start by removing all the clutter words that surround the key words.
I have used red color to mark the objects and green color to mark the relationships.

Step 2: Capture the relationship between objects
Now, focus only on capturing the relationship. Don’t bother to represent the objects in any fancy way. Just a box or a circle with some text is sufficient to represent the objects.
If you do just this, and explain it with words – you will get across much clearer to your audience than your bullet point slides. Here is the representation of the relationship:

You can easily draw this simple representation on a flip chart or a white board or on a piece of paper in a matter of seconds.
This simple diagram shows how the grace period serves as a cushion before the service is disconnected.
Step 3: Visualize the object
After you capture the relationship, you can improve the look and feel of your diagram by visualizing the objects.
This step is useful to make good visual slides out of the diagrams you created in the second step. Using visual slides is a great way to avoid death by PowerPoint.
The result is:

If you want to make the visual slightly better, you may represent the grace period in a more pictorial way.
Since we said that the grace period serves as a cushion between the delay in the payment of subscription fees and stoppage of service, we may represent that as a coil spring between the two.
Here is the final slide:

If you compare the bullet point slide and the visual diagram, you can see the difference:
As you can see, no matter how complicated the original concept seems, we can make it into a simple and easy to understand PowerPoint slide for the audience.
This process just provides the basic premise. If you would like to apply this process to various business situations, learn how to use creative methods like images with analogy, diagrams with dots and arrows etc….
Return to Top of 3 Steps to PowerPoint Diagram Page