Home > All Tutorials > PowerPoint Graphics> 3D Core Diagram in PowerPoint
Learn to create stunning 3D core diagram. Follow our simple step by step instructions to create this useful diagram for your business presentations. This tutorial has also been updated with a step by step video.
The 3D core diagram in PowerPoint you’ll learn is:
 In this article, you will learn to create this beautiful graphic from scratch using basic 3D tools in PowerPoint. We will also show you some variations of core diagram taken from our PowerPoint CEO packs, towards the end of the article. Let us learn to create the graphic right away…
Step 1: Create the base shape
Go to Auto shapes menu and select ‘Oval’ tool. Draw a perfect circle while holding the ‘Shift’ tab. Fill the shape with a color of your choice and remove outline. For this example, we will use red color for shape fill.
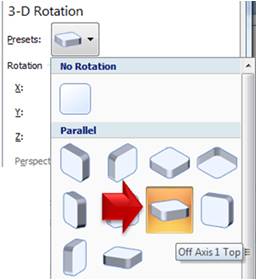
 Right click on the circle and go to ‘Format shape’ option. Under 3D rotation select the preset called ‘Off Axis 1 Top’:
 The result will be as follows:
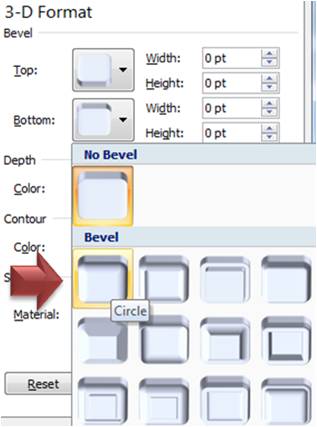
 For ‘Bottom’ surface choose 3D bevel preset called ‘Circle’:
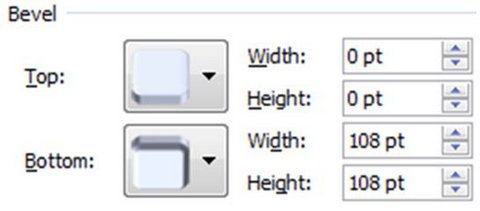
 The next step is to increase the width and height of the bottom surface, so we get a perfect hemisphere. For this, there is a simple calculation:
For every inch of the diameter of the circle, add 36 pts to the width and height of the bottom surface. In our case, the diameter of the circle is 3 inches. So we add 108 pts to width and height of the bottom surface.
 The result will be as follows:
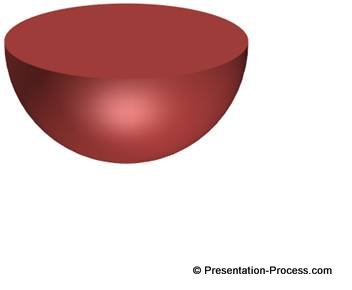 The next step is to draw ‘target’ graphic on top.
Related: Draw Creative 3D Circle In Powerpoint
Step 2: Draw Target graphic on top
In our earlier article, we showed you how to create a target diagram using concentric circles. In case, you haven’t gone through that article, please follow this link to create target graphic in 2D as follows:
 Right click on the target graphic and go to ‘Format shape’ option. Under 3D rotation select the preset called ‘Off Axis 1 Top’ as you did in the earlier step. The result will be as follows:
 Place this concentric circles graphic on top of the hemisphere you created in step 1 to complete the diagram. Of course, you can add a shadow at the bottom of the hemisphere to give the diagram a more realistic look:

View video on how to create this diagram in PowerPoint 2013 and 2016 versions:
Variations of the diagram:
There are many ways you can position the diagram to suit your need. Here are a couple of variations of the core diagram taken from our PowerPoint Charts & Diagrams CEO pack 1. The CEO pack has more than 750 premium charts, graphs, graphics and diagrams to help you visualize every business idea imaginable.
Vertical view of core diagram:
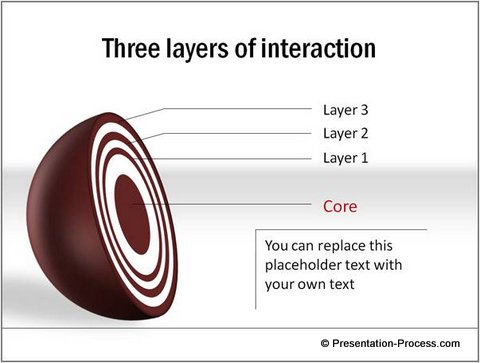 You can also create a cross section view of the diagram from a different angle as follows:

Source: Onion Diagrams from CEO Pack 1
If you don’t want 3D option, you can create a 2D variation of the diagram as follows:
 Who says that you core diagram need always be in circular shape? Here is a variation where we used concentric squares to represent the concept:
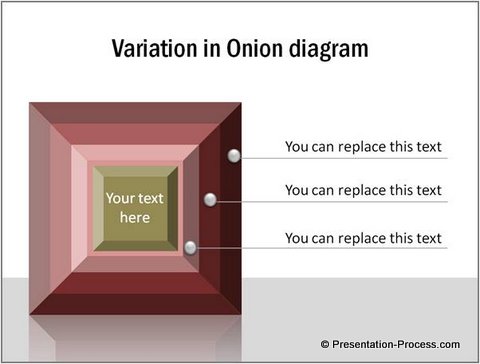
Source: Onion Diagrams from CEO Pack 1
The variation of the 3D core diagram in PowerPoint you come up with depends on your specific need and preference.
[su_spacer size=”20″]
[su_spacer size=”20″]
If you liked this tutorial, please leave a comment below.
Related: Layered Wheel Diagram Template Tutorial
