Home > All Tutorials > Create Icons in PowerPoint
Learn to create icons of your choice in PowerPoint for really fast. This simple idea can help you convey your message with impact in your presentations.
Here are some icons you can create by following this simple PowerPoint Tutorial:
![]()
Benefits of using icons in your business presentations:
Icons are quite useful to convey ideas and concepts in a visual presentation. Here are the top 5 reasons why you should use icons in your business presentations:
- Since icons are easily understood, you can convey a lot of information quickly
- They keep your audience focused on the subject instead of distracting them with details
- Since icons are visual, your message gets absorbed faster and retained longer by your audience
- You can use them to carry forward your story or agenda creatively by repeating appropriate icons in the relevant slides
- You can use them to creatively present data. You can learn more about this in the free 5-day creative presentation ideas e-course.
Why should you create icons on your own?
It is not easy to find icons that have the exact image you want to convey. Even if you do find, they don’t look consistent with your other icons on the slide. So, your slides look unprofessional.
The easy way to work around this is to create your own icons sets. It is surprisingly easy to create them.
Take a look at the following example:
![]()
The icon on the left is created by combining an icon holder and a silhouette.
Yes. The formula is that simple.
Steps to create a custom icon:
- Create a shape of your choice (in our case we used rounded rectangle). Make sure that the shape is ‘constrained’, by holding the ‘Shift’ key while drawing the shape.
- Create a sheen at the top. You can learn to create the professional sheen effect here.
- Download the silhouette of your choice from any of the public domain vector sites like Clker.
- You can also create your own silhouettes from any photo. Take a look at this tutorial on how to create silhouettes in PowerPoint.
The best part is – you need to create the icon holder once and you can use it multiple times throughout your presentation. This not only saves you time, but also makes your icons look consistent.
Take a look at the following examples of icons:
![]()
Since these icons are created using auto shape, you can position them the way you want, with 3D effects on your slides as follows:
![]()
Now, you no longer are constrained by the choice of icons available on the net.
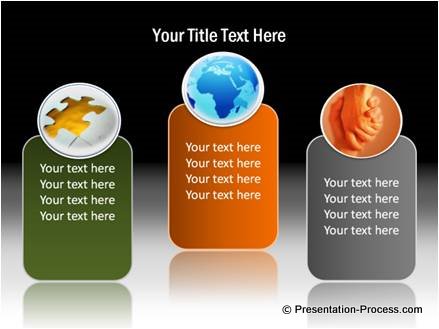
By the way, you can even use photos as icons, like the one below. All you need to do is to fill the shape with relevant picture. You can learn how to create a 3D Circle in PowerPoint here:
 Source: 750+ PowerPoint Charts & Diagrams CEO Pack
Over 156 PowerPoint Business Icons are available free when you purchase the CEO Pack of charts & diagrams. Browse the free icons here.
Conclusion:
It is a good idea to create your own library of icons and make them available throughout your organization. When everyone understands the icons in a consistent way, you can get across your message fairly fast.
Return to Top of Create Icons in PowerPoint Page
