
Home > PowerPoint Tutorials > Special Effects > PowerPoint Reflection
Learn to create a natural reflection effect in a simple step by step way. Overcome the limitations of the default reflection options in PowerPoint.
Problem with default PowerPoint reflection:
A simple way to add visual interest to your photos is to use ‘Reflection’ tool under ‘Picture effects’ tab.
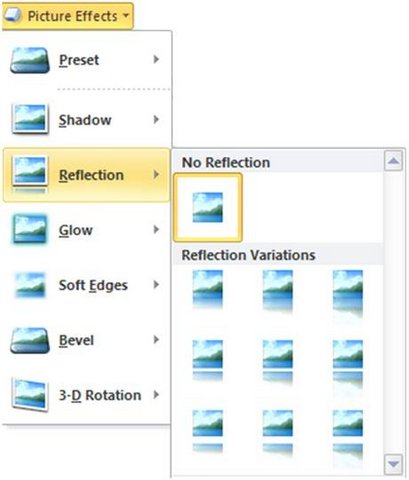 While the effect works quite well for simple photos in 2D perspective, the results are quite poor when the images are in 3D perspective. Here is an example where we applied standard reflection option to an image:
 The reflection looks quite unnatural because of the inherent limitation in the standard reflection options.
In this article, you will learn to create more natural looking reflections by applying a simple technique. The result will be much closer to reality as follows:
 Here are the steps to follow to create more natural reflections in PowerPoint.
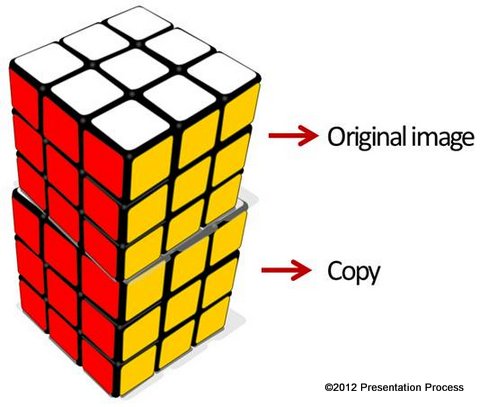
Step 1: Copy the Original
Make a copy of the image and place it below the original image. Use ‘Send to back’ option to push the copy to background. Allow part of the original image to overlap the copy so that the corners in the front coincide:
 Step 2: Create A Gradient
Draw a wide rectangle using ‘Rectangle’ tool in Auto shapes menu. Right click on the rectangle -> go to Format shape -> Fill -> Gradient fill. Use just two gradient stops for the fill.
Let the first stop be at 0%. Make the fill color as ‘White’ to match the slide background color. Change the transparency levels to 50%.
Let the second stop be at 100%. Make the fill color ‘White’ and leave the transparency at 0%.
Here is a quick visual reference for the adjustments:
 Related: Interesting Picture Layering Technique
Step 3: Position the images
Place this gradient rectangle over the copy image. Bring the original image to the front. In other words, position the ‘rectangle with gradient fill’ between the original and the copy image.
 Now the reflection looks natural.
Creating variations of Mirror Images:
Here is another example where we applied the same technique:
 The hand cuffs look as though they are placed on a glass table.
Taking the technique to the next level:
Take a look at this artistic PowerPoint reflection:
 The can looks as if it is placed on a frosted glass table. Here is how we achieved the effect:
First we copied the original image and pasted it upside down below the original image.
Then we applied ‘Artistic effects’ -> Film grain effect on the copy.
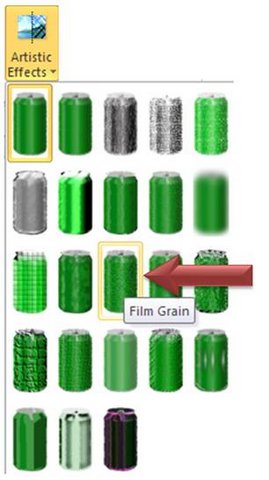 We then placed the rectangle with white gradient fill between the copy and the original image as discussed earlier
It is hard to believe that the effect is created in PowerPoint. It is impossible to achieve such remarkable effects with the default reflection option in PowerPoint.
If you found this tutorial useful, you can subscribe to our newsletter to get latest tutorials and creative presentation ideas delivered to your mail box every week.
Subscribe to our Newsletter below and instantly download Free eBook on 20 Effective Business Presentation Ideas.