Home > All Tutorials > PowerPoint Graphics> PowerPoint Target
Learn to create a stunning 3D target diagram in PowerPoint. Watch and learn from our video tutorial. This tutorial will work in PowerPoint 2007 as well as 2010.
The 3D PowerPoint Target Diagram you’ll learn is:
 Uses of target diagrams:
A target diagram is widely used in business presentations. When you learn to create 3D target of your own, you can have complete control on its look, feel and use.
How to create 3D target diagram?
Step 1: Create the board
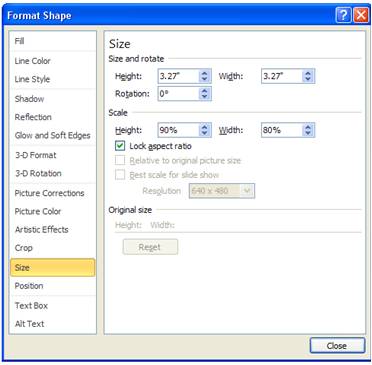
The first step is to create the target board. It is fairly simple to create. Draw a big circle. Make a copy of it. Right click, select Format Shape and go to Size and Position option. You will see the following window:
 Select the ‘Lock aspect ratio’ option and choose the height as 90%. Copy the circle again and repeat the process till you get 7 concentric circles. Make the smallest one to have 60% of the size of the next bigger circle. This will form the bull’s eye of the target.
The next step is to align the circles. For this, go to Format > Arrange > Align > Align Centre and then Align Top. This will ensure that all the circles are perfectly aligned.
Now shade the alternate circles in the color of your choice. For example, in the following diagram, we have colored the outer circle red and the inner circle white and so on.
 Step 2: Creating the angle, lighting and depth
Once you have the target board ready, group all the circles and follow these to complete the diagram:
- Right click on the concentric Circles, go to Format Shapes> 3D Rotation and set the perspective to Perspective Contrasting Left
- Under the rotation options, go to X and click on Left and go to Z and click on Clockwise
- Go to 3D Format options > Colors > select Tan Background 2, Darker 50 option
- In the depth field next to it, add the depth as 20 Pts.
- Change the Material to Dark Edge and Lighting to Three Point. Change the lighting Angle to 220 Degrees.
- The template is complete.
Shortcut to creating 3D Target Diagram
You can also create these concentric circles using SmartArt as a shortcut. This is shown in the video below.
Click PLAY button below to view the tutorial in PowerPoint 2013 / 2016 version:
Once you learn to create the target diagram, you can create your own variations of it.
Related: Create 3D PowerPoint Circle Base
Take a look at the alternate ways of using the 3D Target diagram:

Sample Targets from PowerPoint CEO Pack
In the above alternative, we used the diagram to represent the leadership team.
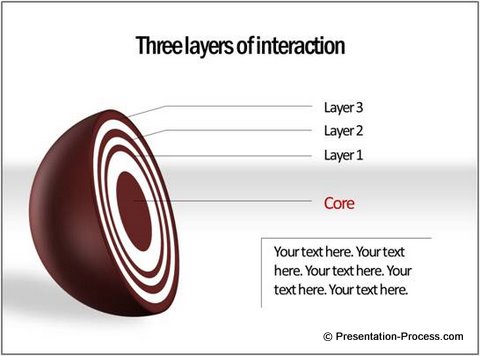
In the following example, we used the diagram to represent three layers of interaction:

Source: Onion Diagrams from PowerPoint CEO pack 1
You can create your own uses for the diagram depending on your creativity.
Conclusion:
Practice 3D PowerPoint target and its variations till you are happy with the result. Please take a look at our other tutorials from this segment. You will not find any other place on the net that gives you such a wide range of in-depth tutorials useful for business presenters on PowerPoint 2007/ 2010.
Please leave a comment below if you liked our tutorials section or recommend the site to your friends.
Related: Create 3D Bridge useful for showing concepts
