
Home > PowerPoint Tutorials > Special Effects > Cutout Effect in PowerPoint
Learn to create paper cut out effect. Follow our simple step by step instructions to spruce up your graphics in business presentations.
Here is the paper cut out effect in PowerPoint you’ll learn to create:

The effect makes your isolated images look more interesting. You can use the effect to perk up your images in eLearning projects, training slides etc. The effect is surprisingly easy to create. Let us learn the steps right away.
Step 1: Start with an isolated image
The first step is to get your base picture in place. Make sure that you have your image isolated on a transparent background as shown below:
 Tip: If you want to know how to remove background using PowerPoint 2010 please follow this article >>
Step 2: Draw an outline around the picture
Go to auto shapes menu. Use the ‘scribble’ tool to draw an outline around the picture as shown below:
 When you draw using the ‘scribble’ tool, you will get a shaky outline. That is exactly what we need for this effect to work.
Related: Use freeform tool to trace shapes
Step 3: Fill shape with paper texture
The next step is to fill the shape with a paper texture of your choice. Click on the shape -> go to Shape fill -> Picture. You can get any number of public domain textures when you search on the net. The result will be as follows:
 Alternatively, you can select the shape and go to Shape Fill > Texture and fill one of the existing light textures.
Now, remove outline and add a shadow preset to the shape by clicking on the image and going to ‘Shape effects’ -> Shadow.
 Related: Create Torn paper texture in PowerPoint
Step 4: Send the shape to the background
The last step is to right click on the shape and ‘send it back’. The final result looks like this:
Related: Create bobblehead doll effect
Uses of this effect:
You can use this effect to create interesting training effect. For example here is a business woman cutout shown in different environments.

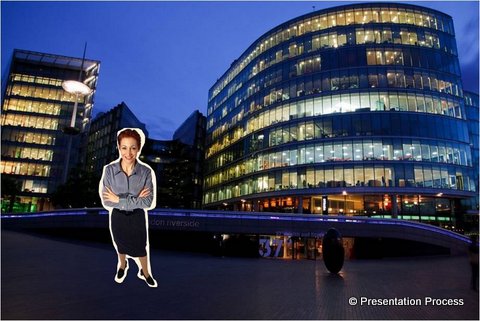 The same image can be used with multiple backgrounds like for case studies or training.
Once you learn the technique you can play around with different textures and shapes.
If you liked this article, please do leave a comment. You can find 200+ advanced PowerPoint tutorials on this website.
Related: Layering effect for Pictures and Text
Return to Main Special Effects in PowerPoint Page