Home > All Tutorials > PowerPoint Tips > PowerPoint Table
 |
In this article you will learn some 3 steps to style your PowerPoint table. These tips help you present your data clearly.
When you insert a table on your slide, PowerPoint gives it a default design as shown below: |
 Default Table
You can add a style to your table and make it look more attractive. You will see the various options you have to improve the look and feel of your tables.
Step 1: Add a Quick style to your table:
A style is a preset of formatting options. You can see the presets when you go to the ‘Design’ tab in PowerPoint ribbon after clicking on the table:
 As you can see, you have a choice to use subtle or bolder options to color your tables. The colors are selected from the theme color set you have chosen for your presentation.
When you move the cursor over the presets you can see the theme applied to the table. This allows you to make your choice easily. We applied Themed Style 2, Accent 5 in PowerPoint 2013 and this resulted in the following formatting:
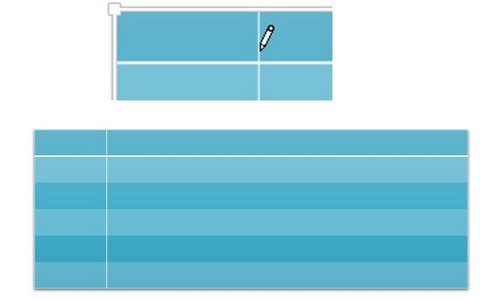 Table with Accent
Quick Tip
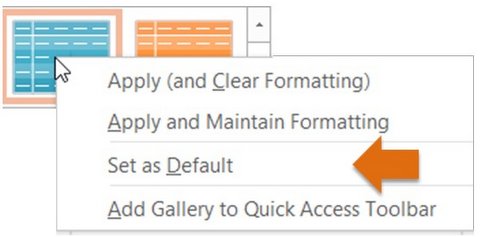
If you want to make a particular style as your default style, right click on the style and select ‘Set as Default’:
 If you don’t want any color applied to the cells, you can select the ‘Clear Table’ option at the bottom of the Quick style sets:
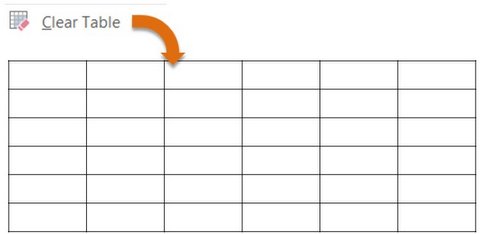 Clear Table Formatting
Related: Using Format Painter to copy styles
Now that you have seen the default styles available, the next step is to..
Step 2 : Modify the Table Style:
The Quick style formatting of a table is not final. You can modify the style to suit your needs. For this, click on the table and go to the ‘Design’ tab. Choose the table style option you need. Let us say we add a Header row, First column and Banded Rows to the formatting style:
 Understanding Table Styling Options
If you had selected the default color theme you would have the following result:
 If you apply a Quick style, the result will be as follows:
 On this quick style, you can add remove table style options to create your customized look for a table. The last step by which you can style your PowerPoint table is…
Step 3 : Add a border to a row or column:
Select a column in the table. Go to the ‘Design’ tab and click on ‘Draw Table’ option. This will turn the cursor into a pencil icon. Drag the pencil cursor along the line you want to convert as border.
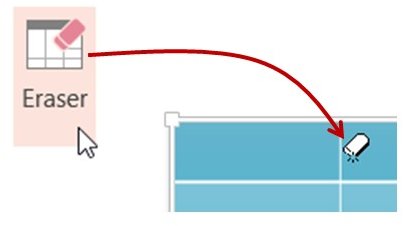
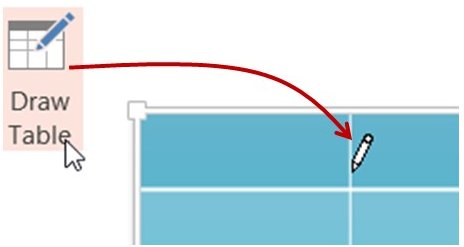 You can erase any border by clicking on the ‘Eraser’ tool in the Design tab. When you click on the tool, the cursor turns into an eraser. When you drag the eraser cursor along the line you want to erase, the border gets erased.
 Thus by adding a quick style and relevant borders, you can make your table look professional.
If you found this article, please leave us a comment below. You will find 200+ PowerPoint tutorials on this site.
You may like: Create Fancy Tables in PowerPoint
