
Home > PowerPoint Tutorials > Smart Art > Arrows PowerPoint
Discover the hidden possibilities with SmartArt. Here we teach you how to draw 3D cyclic arrows using SmartArt object. Learn from the step-by-step video tutorial.
The 3D Cyclic Arrows PowerPoint Diagram you will learn is:


It looks as if it has no relation to Smart Art. But, you’ll learn how to create this elegant diagram using a SmartArt object called ‘Segmented Cycle’.
Since you have the option to create any number of sectors in a Segmented Cycle SmartArt object, by pressing ‘Enter’ in the text pane, you can create a diagram with any number of cyclic arrows using the method you’re about to learn. That’s what makes this tutorial so useful.
Before you learn the tutorial, I wish to convince you of the utility of 3D cyclic arrows in general. Here are some of the cyclic arrow diagrams from our 750+ PowerPoint Charts & Diagrams PowerPoint diagrams pack for CEOs.
1. 4 Reinforcing factors PowerPoint Diagram
You can use cyclic arrows diagram to explain reinforcing factors in a process or alignment around a clients needs. The tutorials for creating Glossy Ball is available here.

Source: PowerPoint Circle Diagrams | CEO Pack
2. The Missing Piece or Critical Factor PowerPoint Diagram

You can use the diagram to highlight the missing piece in a link or to highlight one critical factor out of many in a process.
3. 2 sides of the issue diagram
2 Cyclic arrows can depict two interrelated sides of the issue.

Source: Cycle Diagrams from PowerPoint CEO Pack
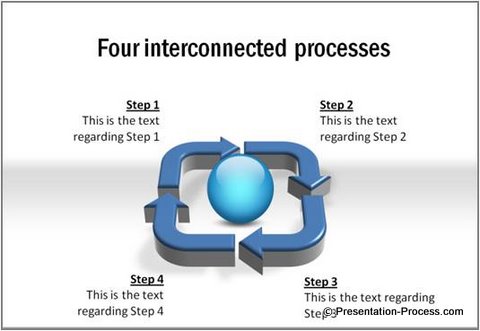
4. 4 interconnected processes diagram
You can use cyclic diagrams to portray loops or interconnections in a process.
5. Steps in a process diagram
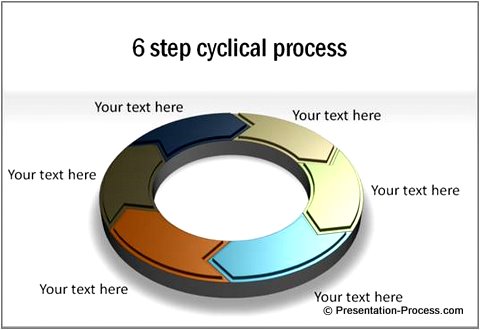
Source: PowerPoint Circle Diagrams from CEO Pack
You may also like:
Ultimate Guide To SmartArt in PowerPoint
Here are the steps to create the diagram:
- Go to Insert > SmartArt Option in the menu
- Insert the Segmented Cycle chart
- Select all objects in the chart by using Ctrl + A
- Cut the selected objects using Ctrl + X
- Delete the bounding box. This ensures that the object is no longer a SmartArt chart
- Paste back the chart
- Delete all the parts of the chart except the 3 circular Arrows
- Group the Arrows using Ctrl + G
- Increase the width of the arrows by pulling in the yellow diamond handles
- Select the object, Format it > 3D Rotation Option and set it as Relaxed Perspective
- Go to 3D Format Option, set Depth to 30
- Change the Fill Color to suit your requirement
- Your cyclic 3D Arrows are ready!
Related: Create Branched PowerPoint Arrow
Conclusion:
Even though we publish a wide variety of remarkable tutorials in this segment, you need a lot of practice to get the design right. Keep trying different alternative arrows in PowerPoint till you are happy with the result.
Here is a sample of the same diagram from the CEO pack

If you are too busy to experiment, consider our 750+ PowerPoint Charts & Diagrams pack. The above template is also from the same pack. Why compromise on the professional look and feel of your slides, when you can achieve surprising results in a matter of minutes with these ready-to use diagrams?
The pack has Over 750 unique PowerPoint diagram templates to help you visualize any business idea or concept quickly and creatively. Just ‘Copy- Paste’ and your presentations get ready in minutes.
Click here to learn more about PowerPoint Charts CEO pack…
Related: Boring List to Smart Graphics in PowerPoint
Return to Top of 3D Arrows PowerPoint with SmartArt Page


